116 Scale Funny Car Chrome Rims
so yea.........I started to tinker with it at first light.........start the year off with a bang! the kit is in really good shape.......a little concerned about the decals, but I'll try one of the smaller decals first {one I can copy}, to see if they will be OK. the kit was produced in 1988.......mold stamped on the lower body pan. kinda ticks me off though, that they would stamp the part numbers on most of the parts themselves......and the sprues too. now I have to scrape them off the areas that can be seen and sand them 'gone'. at this time, I will assemble all the components that can be painted as a whole, and then detail from there. starting with the body, the grille and rear deck was cemented in place.
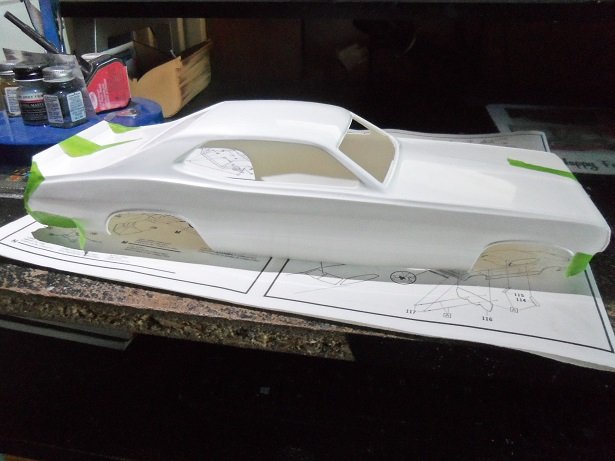
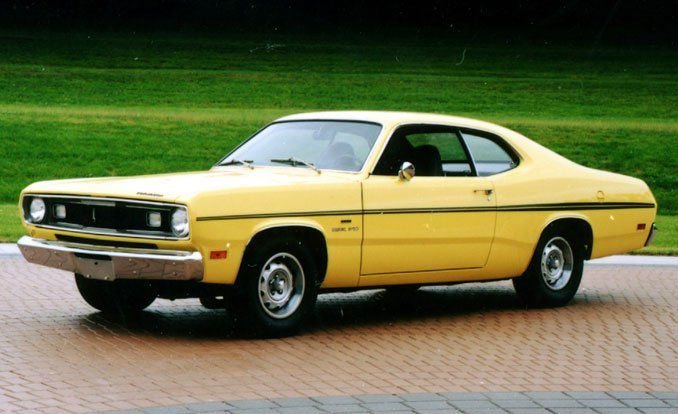
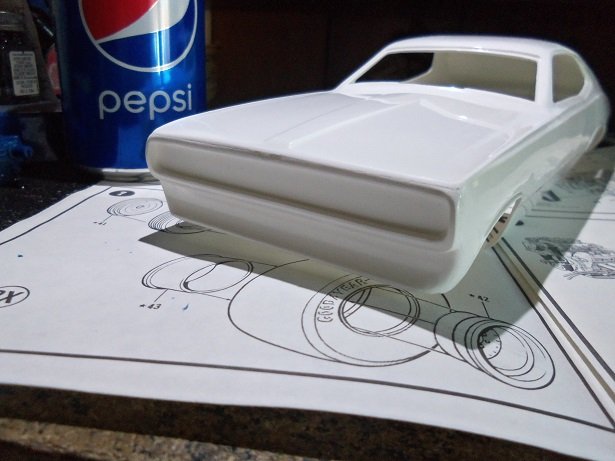
both of these models sport the Plymouth Duster body. it's based on the 1970 Plymouth Duster 340 coupe {two door} model.
_(cropped).jpg.ad1f3cce186f755065630586c448d6b7.jpg)
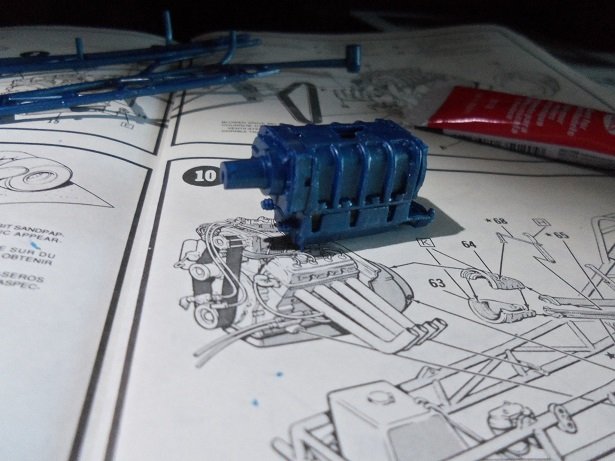
setting the body aside, the basic parts for the engine block were pulled out. the block halves, the oil pan, the heads, and the timing cover, were assembled and sanded, readied for paint.
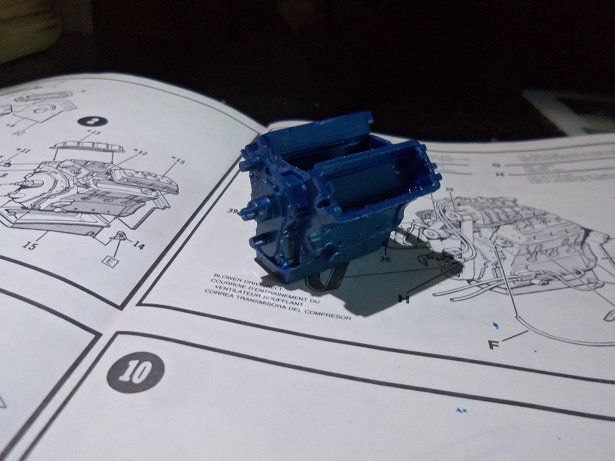

the intake manifold and supercharger are to be different colors.....with the intake being one color, the supercharger was assembled separately. here it is shown on the intake.
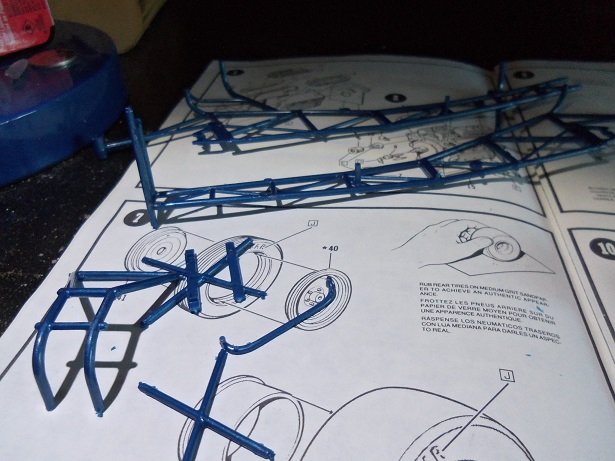
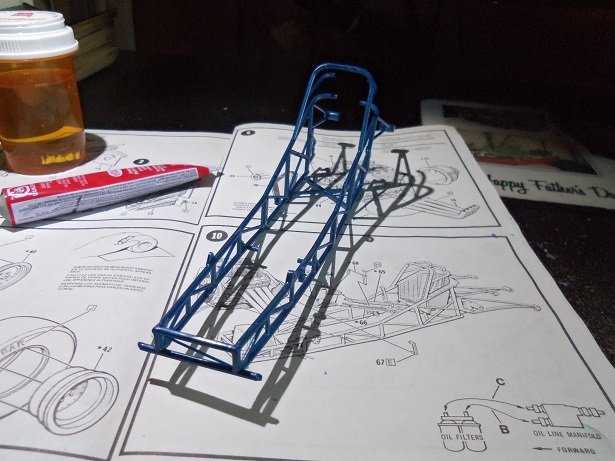
the chassis / roll cage was next to be assembled....just the frame for now. there was a bit of disappointment in seeing the two main frame parts being warped. gotta come up with a plan to straighten it.
while thoughts were forming, I was looking for two other parts for the supercharger.......I had my suspicions![]() yup! there they were.........on the chrome sprue......bother! I don't know 'bout chu.......but there are some parts that ya wish they wouldn't include to be chromed! I was never a huge fan concerning chrome anyway........in a lot of instances, it kind of takes away from the model. in these more modern times, paints have been developed that look better than being chromed. it looks terrible after the sprue connections are cleaned, along with any flash and mold lines, and looks even worse touched up with silver {before they came out with chrome silver}.
yup! there they were.........on the chrome sprue......bother! I don't know 'bout chu.......but there are some parts that ya wish they wouldn't include to be chromed! I was never a huge fan concerning chrome anyway........in a lot of instances, it kind of takes away from the model. in these more modern times, paints have been developed that look better than being chromed. it looks terrible after the sprue connections are cleaned, along with any flash and mold lines, and looks even worse touched up with silver {before they came out with chrome silver}.
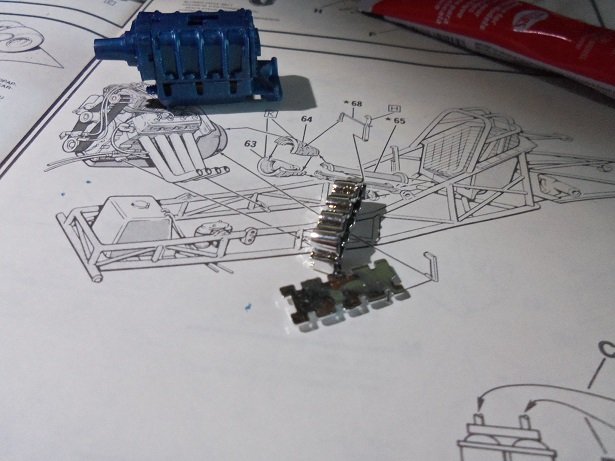
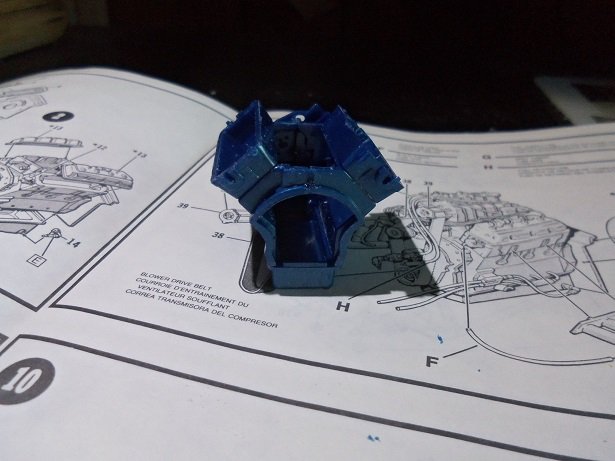
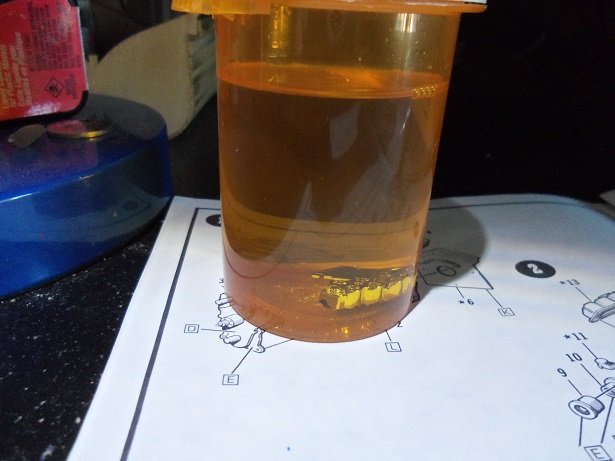
this is a plate that sits on top of the supercharger and the induction plate {w/ no butterfly detail}. a molded fuel rail will envelope the induction plate once assembled on the supercharger. there is no color designation for the plate, but there is for the induction plate......and it's a different color. so the chrome must be removed from the parts.......I refuse to paint over it. I use brake fluid to remove the chrome.......depending on the age of the model, will decide on how fast it will work.........takes longer for the newer models.
so let's see..........8:30 AM..........and counting. the frame was assembled to reveal just how warped it was.
adding the rest of the roll cage and the fuel cell shelf, it cured it a little, but it was still badly warped. while it was still susceptible {the glue still setting}, an alignment rack was devised to arrest the frame to correct the warpage. simple really.........
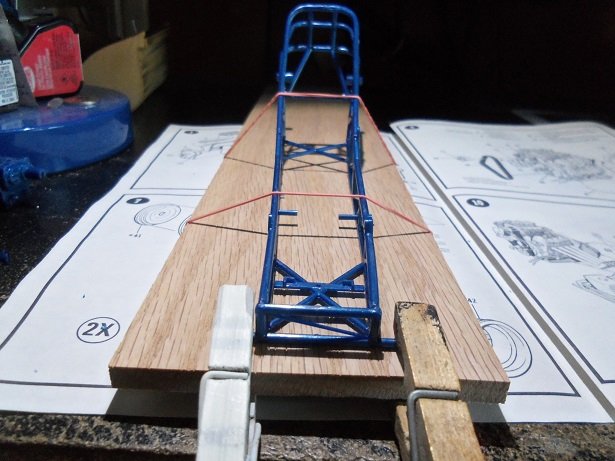
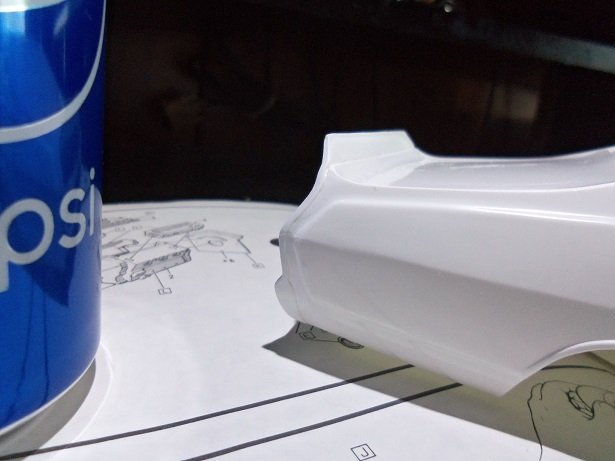
using the base for the Arizona project {it's still alive, BTW}......the frame, as can be seen, is held down with rubber bands, while the front suspension bar is held down with clothes pins. this will sit for the night.......I'll check it in the AM. setting this aside, the tape was removed from the body, and was sanded to remove mold lines and other malformations. attention was given to the front grille and rear deck as well.
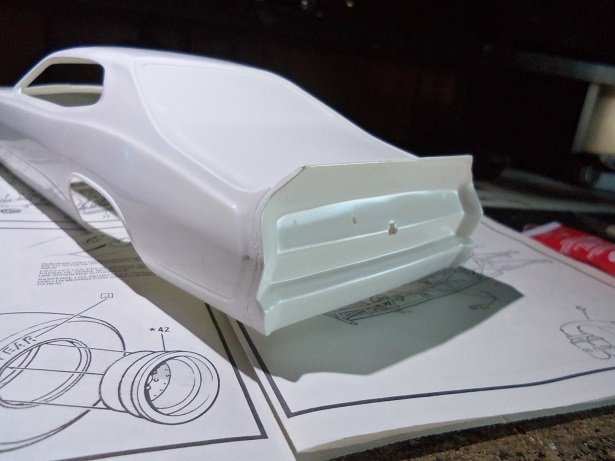
you might be able to see a gap.....more like a slot, towards the center of the hood........don't know what that's all about....it was molded that way. I filled it with glue and will let it dry......I'll fix it later. I also added glue to the four corners.......dab on a thin line of glue and wipe, to fill in the cracks.
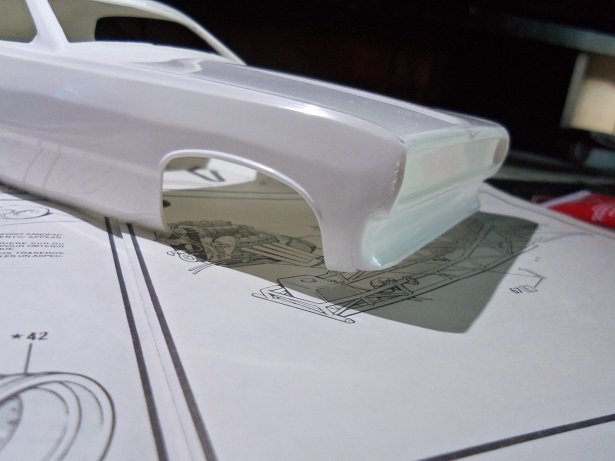
I tried to sand here, at this corner..........not quite to the safe point yet. as I was doing this, I got a sense that I was doing more than I did for the English Leather.........maybe I learned something.......who knows >shrug< ![]() it was at this point, when I began noticing all the part numbers on the parts....why in the blue blazes did they do that!?!?! as with the English Leather, the inner body panels was a huge question mark. there is a front panel and a rear panel, where the chassis hooks to {frame / roll cage}. in the close position, the frame nestles in slots carved out on the front inner panel. there is another huge panel that encloses the cockpit and roll cage. these need to line up, so the body will sit properly on the chassis. these parts were cleaned up and dry fitted in place.
it was at this point, when I began noticing all the part numbers on the parts....why in the blue blazes did they do that!?!?! as with the English Leather, the inner body panels was a huge question mark. there is a front panel and a rear panel, where the chassis hooks to {frame / roll cage}. in the close position, the frame nestles in slots carved out on the front inner panel. there is another huge panel that encloses the cockpit and roll cage. these need to line up, so the body will sit properly on the chassis. these parts were cleaned up and dry fitted in place.

I can't find out any more until tomorrow, so I guess this would be a good place to stop. I have other car models I built over this past year......those are 1:25 scale. if interested, you can see the logs at: http://wenzelsautobody.wordpress.com/
you'll find the Batmobiles there too.........as a matter of fact, I gotta get moving and finish the Adam West Batmobile!
Source: https://modelshipworld.com/?/topic/19775-revell-revellution-funny-car-116-scale-by-popeye-the-sailor/